Appearance
Pricing Collection
The Pricing collection controls the feature comparison table on your /pricing page.
How It Works
The pricing page displays a three-column comparison table with plan features. Each CMS item creates one row in the table.
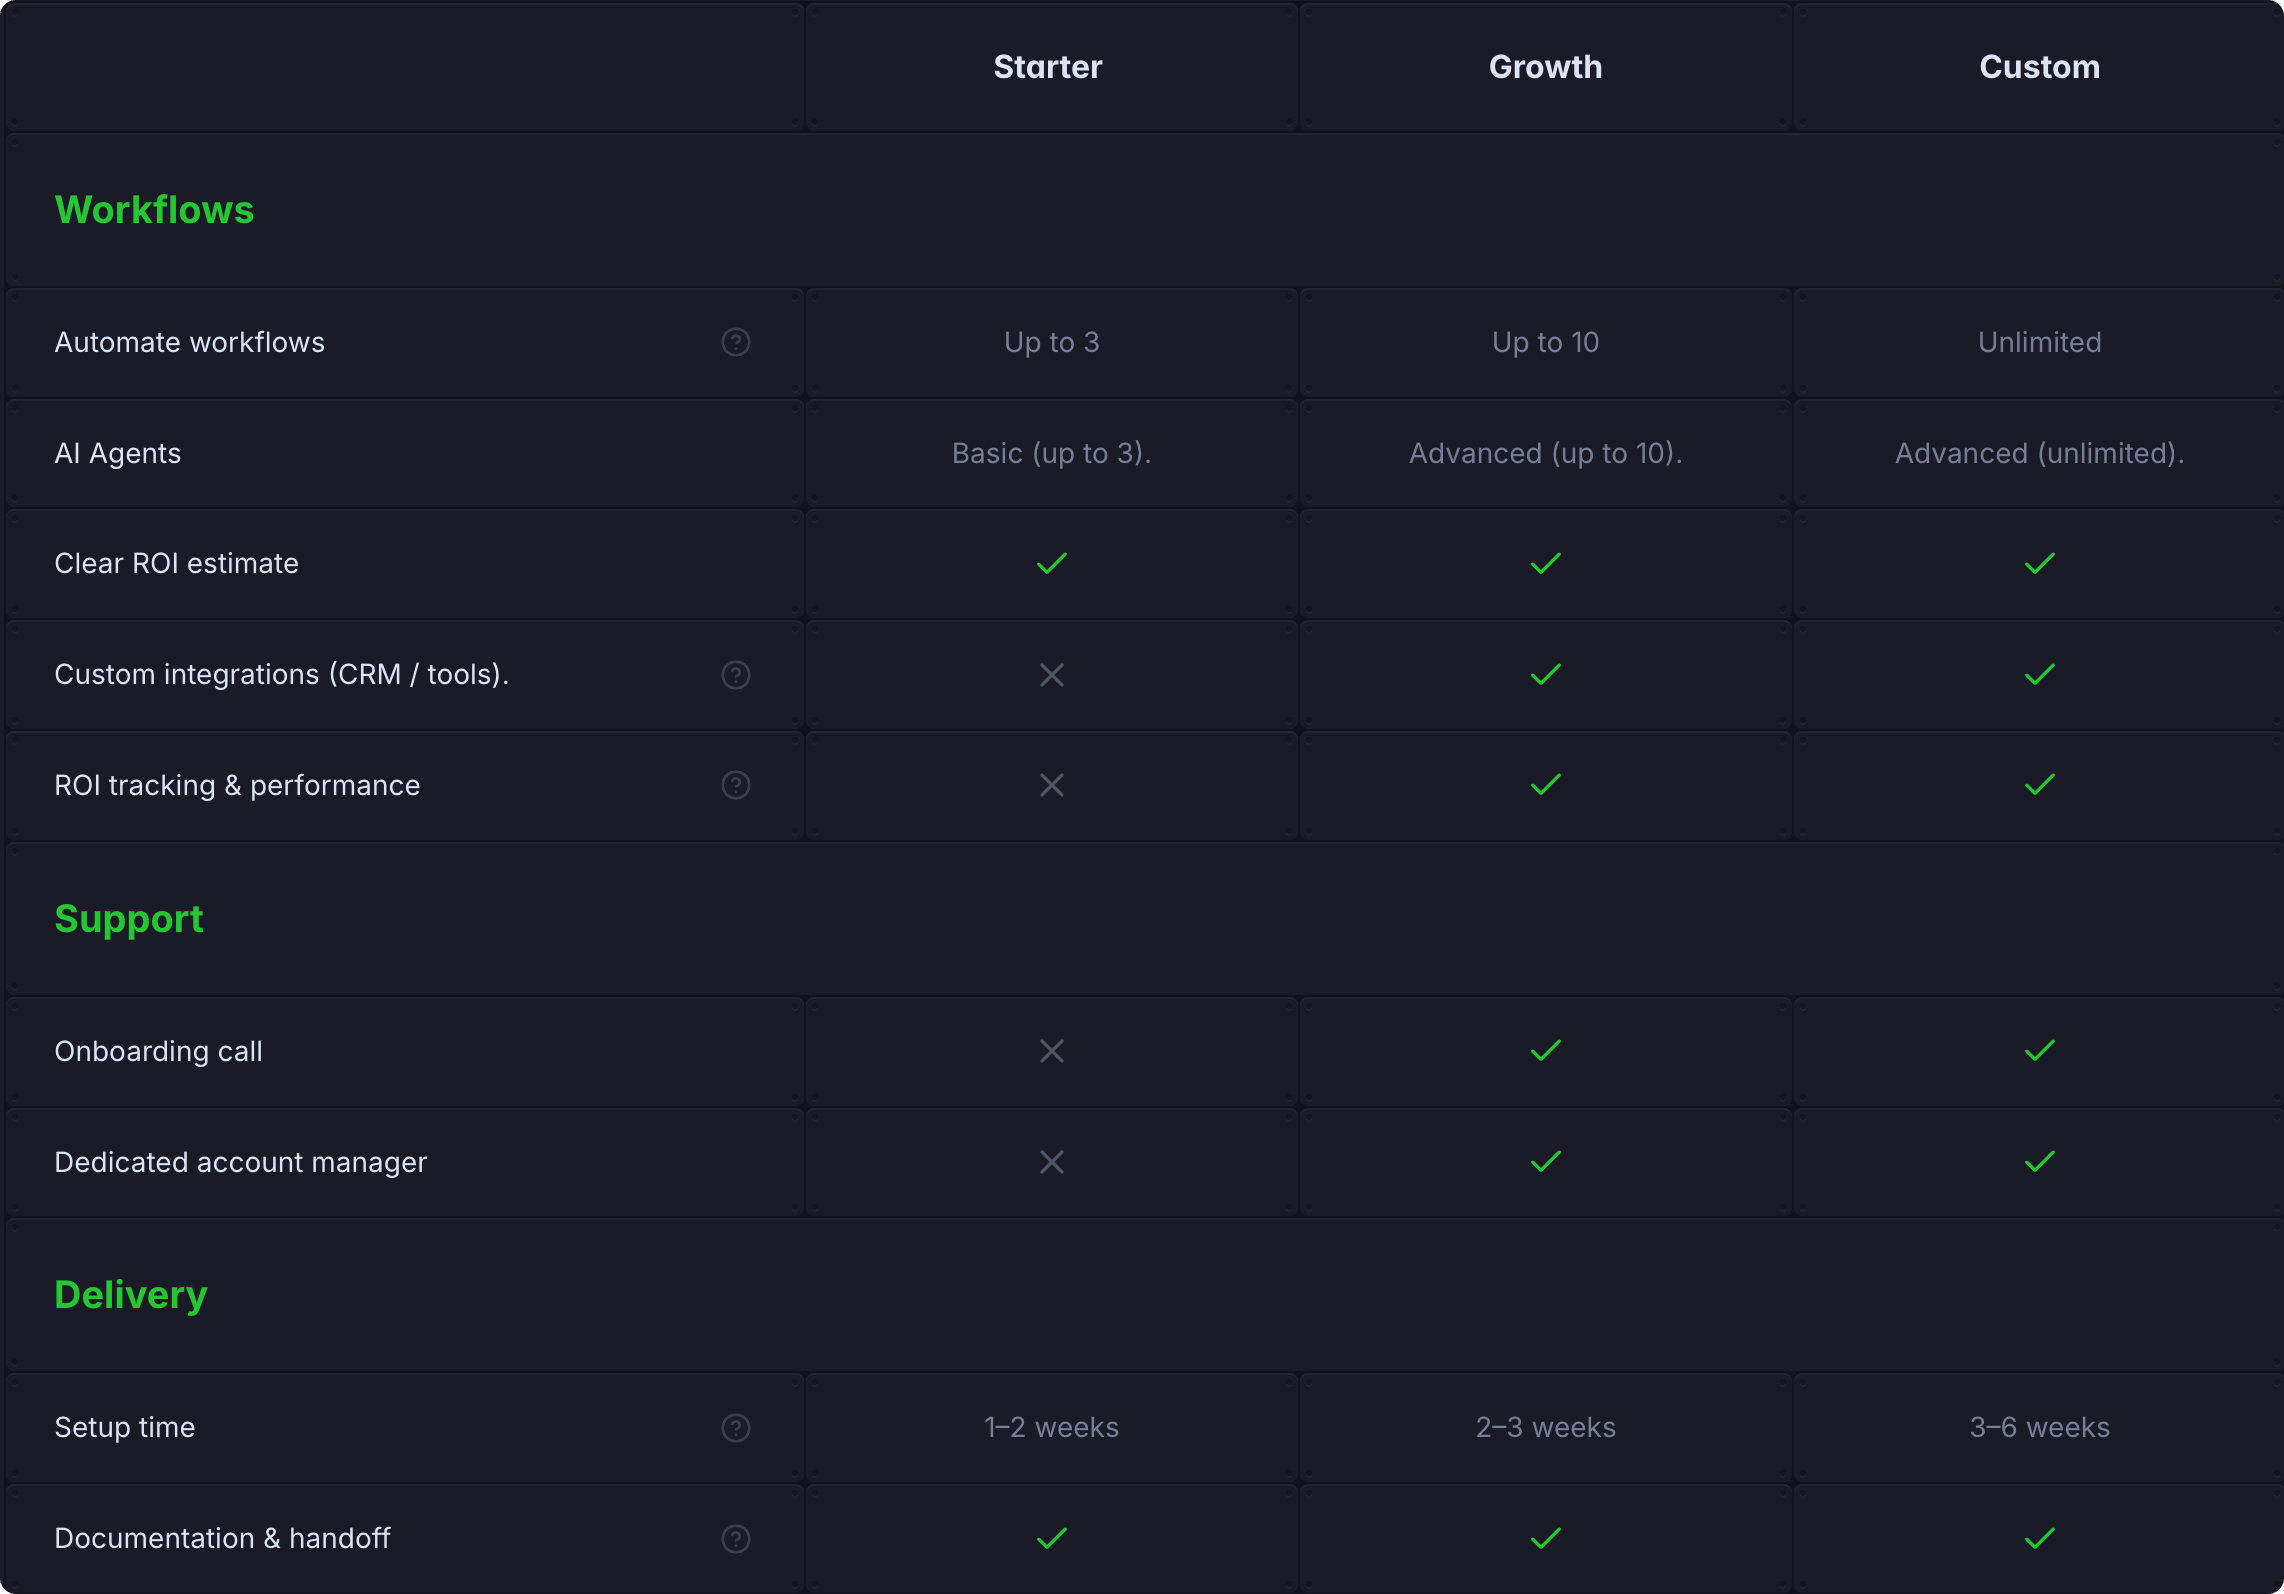
You can:
- Add feature rows showing what's included in each plan
- Add section headers to group features by category
Fields
General Info
| Field | Type | Notes |
|---|---|---|
| Name | String | Feature name or section header (e.g., "API Access", "Integrations") |
| Type | Enum | Section = category group header, Feature = comparable row across all plans |
| Tooltip | String | Optional hint text shown on hover next to the feature name. Leave empty to skip |
Plan 1, Plan 2, Plan 3
For each plan column, configure:
| Field | Type | Notes |
|---|---|---|
| Info (Plan X) | String | Text shown in this plan's cell. Only visible when "Show Icon" is turned off |
| Show Icon (Plan X) | Boolean | Turn Yes to display an icon (✓ or ✗), No to show the Info text |
| Icon (Plan X) | Enum | Pick ✓ for included or ✗ for not included. Only applies when "Show Icon" is on |
Not Relevant
| Field | Type | Notes |
|---|---|---|
| Slug | String | Auto-generated, you can ignore it |
Example Feature Row
Feature: "Custom Integrations"
| Field | Value |
|---|---|
| Name | Custom Integrations |
| Type | Feature |
| Tooltip | Connect to any third-party API |
| Info (Plan 1) | — |
| Show Icon (Plan 1) | Yes |
| Icon (Plan 1) | ✗ |
| Info (Plan 2) | Custom |
| Show Icon (Plan 2) | No |
| Icon (Plan 2) | — |
| Info (Plan 3) | Unlimited |
| Show Icon (Plan 3) | No |
| Icon (Plan 3) | — |
Result in table:
| Feature | Plan 1 | Plan 2 | Plan 3 |
|---|---|---|---|
| Custom Integrations | ✗ | Custom | Unlimited |
Example Section Header
Section: "Integration & API"
| Field | Value |
|---|---|
| Name | Integration & API |
| Type | Section |
| Tooltip | (empty) |
TIP
When Type is "Section", you don't need to fill in the Plan 1/2/3 fields (Info, Show Icon, Icon). Just set the Name and Type, and leave the rest empty. The section header will appear as a category divider in the pricing table.
Icon vs Text
Choose how to display each plan's offering:
- Show Icon = Yes → Displays ✓ (included) or ✗ (not included) as a symbol
- Show Icon = No → Displays the Info text (e.g., "Custom", "Unlimited", "$99/mo")
This flexibility lets you show:
- Simple checkmarks/crosses for basic yes/no features
- Descriptive text for features with variations (e.g., different limits per plan)
Adding Pricing Features
- Open CMS panel → Pricing
- Click New Item
- Fill in the Name and Type (Feature or Section)
- For each plan, decide:
- Show Icon: Yes (for ✓/✗) or No (for custom text)
- Icon: ✓ or ✗ (if Show Icon is Yes)
- Info: Text like "Custom", "Unlimited", "$99/mo" (if Show Icon is No)
- Click Save
Editing the Comparison Table
To customize plan names and CTA buttons in the comparison table, see the ComparisonTable component documentation.